When it comes to keeping your home clean, a well-functioning vacuum cleaner is essential. However, over time, the belt that drives the brushroll may wear out or break, resulting in reduced cleaning efficiency. But fear not! Replacing a vacuum cleaner belt is a straightforward process that you can easily do yourself.
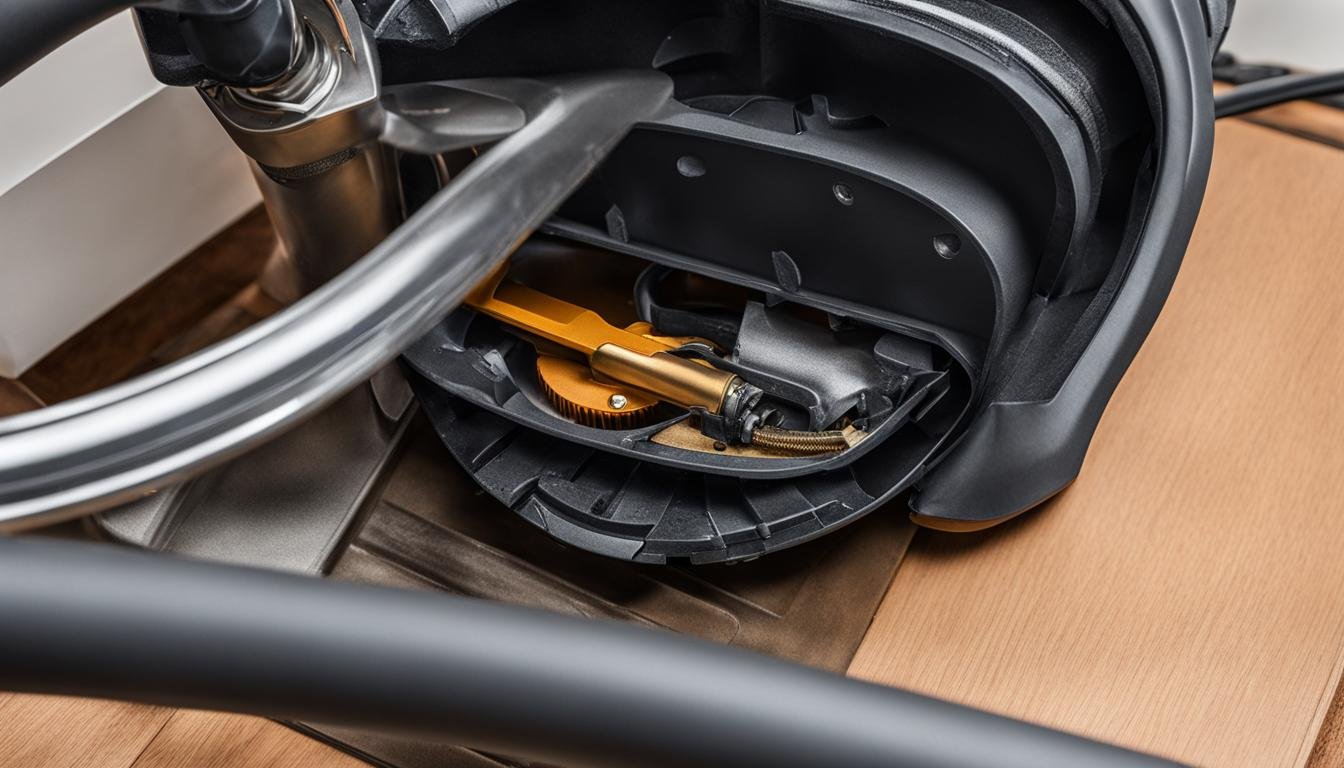
To start, the first step is to access the vacuum belt and brushroll area. This can be done by removing the bottom plate of the vacuum, which is typically held in place by screws or clips. With the bottom plate off, you’ll have a clear view of the belt and brushroll.
The next step is to remove the old belt. Take out the brushroll by pulling it away from the vacuum and sliding it out of the belt loop. This will free the old belt from the brushroll. It’s a good idea to inspect the brushroll for any excessive dirt or debris and clean it if necessary.
Once the old belt is removed, it’s time to install the new one. Start by placing the new vacuum belt on the motor shaft, ensuring it fits securely. Then, loop the belt around the brushroll and make sure it is properly aligned. The belt should be taut but not overly tight.
After the new belt is securely in place, it’s time to reassemble the vacuum. Return the brushroll to its original position and slide it back into its designated slot. Then, replace the bottom plate of the vacuum, ensuring all screws or clips are securely fastened.
It’s important to note that while these steps provide a general guideline for vacuum belt replacement, different vacuum models may have variations in the process. Always refer to the manufacturer’s instructions for your specific vacuum model to ensure proper belt replacement.
By following these step-by-step instructions, you can easily replace a vacuum cleaner belt, restoring your vacuum’s cleaning power and efficiency. Don’t let a worn-out belt hinder your cleaning efforts—tackle the task yourself with confidence!
Key Takeaways:
- Replacing a vacuum cleaner belt is a simple DIY task that can be done at home.
- Access the vacuum belt and brushroll area by removing the bottom plate of the vacuum.
- Remove the old belt by taking out the brushroll and sliding it out of the belt loop.
- Install the new vacuum belt on the motor shaft and loop it around the brushroll.
- Reassemble the vacuum by returning the brushroll and securely fastening the bottom plate.
How to Choose the Right Vacuum Cleaner Belt
When it comes to vacuum cleaner maintenance, one important aspect is the replacement of the vacuum belt. Choosing the right belt for your specific vacuum model is crucial to ensure proper functioning and performance.
Vacuum belts come in various types, sizes, thicknesses, and styles. To find the perfect replacement belt for your vacuum, it is recommended to check the manufacturer’s website or contact them directly. They will provide you with the correct information based on your vacuum model.
Regularly maintaining and checking the condition of your vacuum cleaner belt is essential to prolong its lifespan and prevent any unexpected issues during use. It is advisable to inspect the belt for signs of wear and tear, such as fraying or stretching. If you notice any damage or deterioration, it’s time for a replacement.
By selecting the right vacuum cleaner belt and performing regular maintenance, you can ensure optimal performance and longevity of your vacuum cleaner. Now, let’s move on to Section 3, where we’ll wrap up this step-by-step guide and provide some closing thoughts on vacuum cleaner belt replacement.
Note: The image above is for illustrative purposes only and may not depict the exact vacuum cleaner belt being discussed.
Conclusion
Replacing a vacuum cleaner belt is an important part of regular maintenance that can easily be done at home. By following the step-by-step guide provided in this article and selecting the appropriate replacement belt for your vacuum model, you can ensure optimal performance and extend the lifespan of your vacuum cleaner.
Regularly checking and maintaining your vacuum cleaner belt is crucial to prevent any malfunctions and keep your vacuum in top condition. By inspecting the belt for signs of wear or damage, such as fraying or stretching, you can identify the need for replacement before it affects the vacuum’s performance.
Remember to consult the manufacturer’s instructions and guidelines specific to your vacuum model for any additional information or variations in the process. Each vacuum may have its own unique requirements and recommendations, so it’s always best to refer to the manufacturer’s recommendations.
FAQ
How do I replace a vacuum cleaner belt?
To replace a vacuum cleaner belt, follow these step-by-step instructions. First, access the vacuum belt and brushroll area by removing the bottom plate of the vacuum. Then, remove the old belt by taking out the brushroll and sliding it out of the belt loop. Install the new vacuum belt on the motor shaft and brush roller, ensuring proper positioning. Finally, reassemble the vacuum by returning the bottom plate and any other housing pieces that were removed. Remember to check your specific vacuum model for any variations in the belt replacement process.
How do I choose the right vacuum cleaner belt?
When replacing a vacuum cleaner belt, it’s important to choose the right one for your specific vacuum model. Vacuum belts can differ in size, thickness, and style, so it’s crucial to have the correct belt to ensure proper functioning. Check the manufacturer’s website or contact them directly to find the right replacement belt for your vacuum.
Why is regular vacuum cleaner belt maintenance important?
Regularly maintaining and checking the condition of your vacuum cleaner belt can help prolong its lifespan and prevent any unexpected issues during use. By keeping the belt in good condition, you can ensure optimal performance and longevity of your vacuum cleaner. Regularly checking and maintaining your vacuum cleaner belt will help prevent any malfunctions and keep your vacuum in top condition. Remember to consult the manufacturer’s instructions and guidelines for your specific vacuum model for any additional information or variations in the process.


Leave a Reply