I’m excited to share with you a comprehensive guide on how to test a vacuum cleaner motor with a multimeter. Whether your vacuum cleaner is showing signs of motor issues or you simply want to ensure its optimal performance, this step-by-step tutorial will help you diagnose and troubleshoot any potential problems.
Before we get started, it’s crucial to emphasize safety. Always remember to unplug your vacuum cleaner before conducting any tests or inspections. This will protect you from any electrical hazards and ensure a safe working environment.
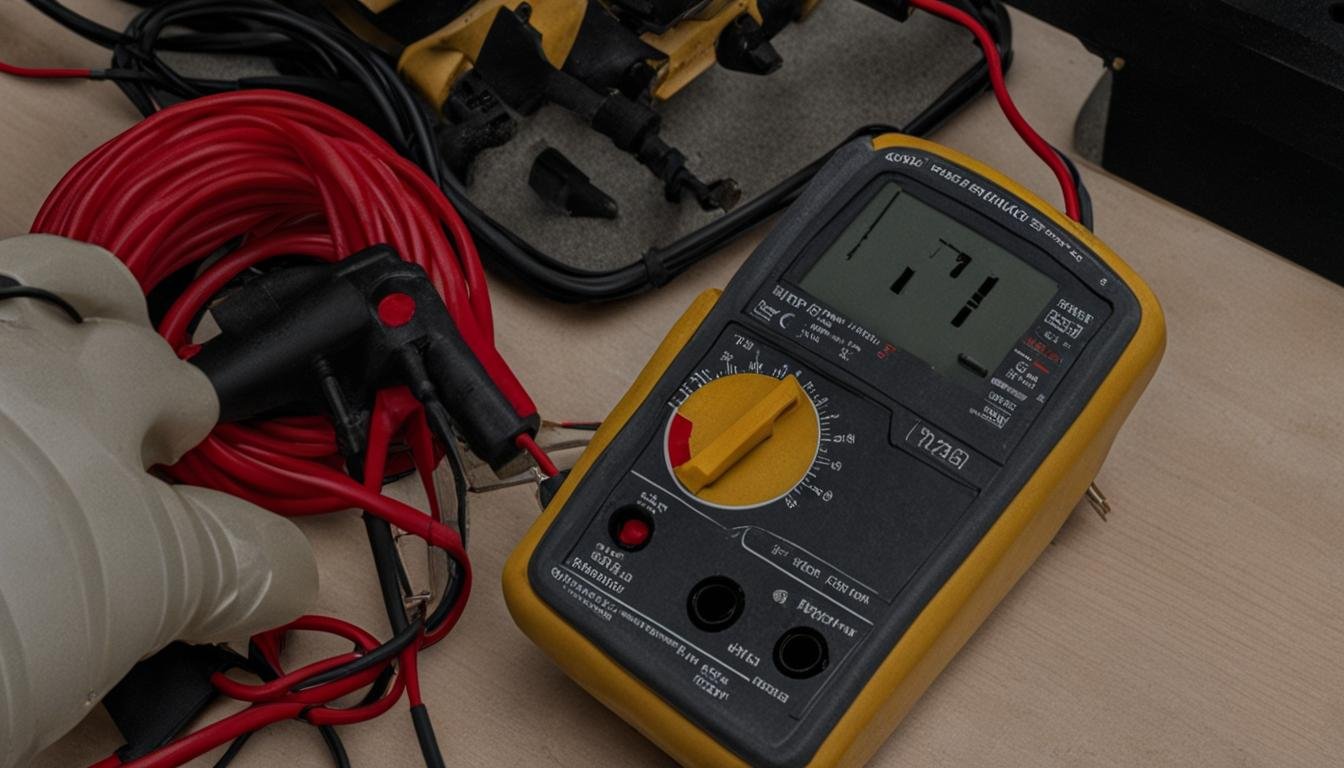
Now, let’s dive into the testing process. To begin, set your multimeter to the resistance setting. This allows you to measure the resistance of the electrical circuit within the vacuum cleaner motor. Place the probes on the neutral and live pins of the plug. A reading of zero resistance indicates a fault in the circuit, which would require further investigation.
Next, move on to testing the fuse within the plug. Use the multimeter to check the resistance of the fuse. If the fuse has low resistance, it is not the source of the motor issue. In this case, we’ll need to explore other potential causes.
One common culprit of motor malfunction is a loose connection in the cable that connects to the switch. Remove the top of the switch cover and inspect the cable connection. If you notice any loose or disconnected wires, reconnect them securely. This may resolve the problem and restore the motor’s functionality.
Lastly, take a close look at the motor itself, specifically the carbon brushes. Over time, carbon brushes can wear down and fail to make proper contact with the motor’s commutator. This disruption in the circuit can lead to motor issues. Check the length and condition of the brushes, and if necessary, replace them to restore optimal performance.
Key Takeaways:
- Testing a vacuum cleaner motor with a multimeter can help identify potential faults in the electrical circuit.
- Always prioritize safety by unplugging the vacuum cleaner before conducting any tests or inspections.
- Set the multimeter to the resistance setting and measure the resistance between the neutral and live pins of the plug.
- Check the fuse within the plug for low resistance as a potential cause of the motor issue.
- Inspect the cable connection to the switch for loose or disconnected wires, and ensure a secure connection.
Troubleshooting Vacuum Cleaner Motor Issues
If your vacuum cleaner motor is not working and you have tested it with a multimeter without identifying any faults, there may be other issues to troubleshoot. Here are some common problems and solutions to help you diagnose and fix the problem.
No Power: Dead Motor
If there is no power or a clicking sound when attempting to turn on the vacuum, it could indicate a dead motor that needs replacement. In this case, it is recommended to consult a professional or contact the manufacturer for assistance.
Burnt-out Motor
If you notice a strong smell coming from the motor, it could be a sign of a burnt-out motor. This usually occurs due to excessive use or overheating. A burnt-out motor would need to be replaced.
Motor Turning On and Off
If the motor is still running but turns on and off on its own, it may be on the verge of failure. This can be caused by issues such as overheating or electrical faults. It is recommended to check the wiring and connections for any loose or damaged components.
Motor Brushes
If you notice lots of blue sparks while the motor is running, it may be a sign that the motor brushes are worn down and need to be replaced. Carbon brushes play a crucial role in completing the circuit and if they are worn down, it can lead to motor failure. Inspect the size and condition of the carbon brushes and replace them if necessary.
To effectively troubleshoot the issues mentioned above, it is important to follow proper safety precautions and consult the vacuum cleaner’s manual for guidance. If you are unsure or unable to identify the cause of the motor malfunction, it may be necessary to consult a professional technician for further assistance.
| Issue | Symptom | Possible Cause | Solution |
|---|---|---|---|
| No Power | No response, clicking sound | Dead motor | Contact professional or manufacturer |
| Burnt-out Motor | Strong smell | Overuse, overheating | Replace motor |
| Motor Turning On and Off | Intermittent power | Overheating, electrical faults | Check wiring and connections |
| Motor Brushes | Blue sparks | Worn-down brushes | Replace motor brushes |
Testing and Troubleshooting Vacuum Motor Components
In addition to the motor itself, several other components can cause issues with a vacuum cleaner. Let’s explore how to test and troubleshoot these important elements: vacuum motor brushes, vacuum motor transformer, vacuum motor relay, and vacuum motor circuit board.
1. Vacuum Motor Brushes
The motor brushes in a vacuum cleaner make contact with the motor’s rotating copper armature. Over time, these brushes can wear down, leading to poor performance and electrical problems. One common issue is the presence of large blue sparks wrapping around the commutator. To address this, check the length of the motor brush “lead” and replace it if it is near 3/8 inch or has damaged the commutator. Ensuring the motor brushes are in good condition is crucial for the overall functioning of the vacuum cleaner motor.
2. Vacuum Motor Transformer
The vacuum motor transformer is responsible for converting the electrical voltage to the appropriate level for the motor. To test the transformer, apply 110 volts to the relevant wires and observe for a spark. If there is no spark, it is likely that the transformer is faulty and needs to be replaced. A well-functioning transformer is essential for ensuring the motor receives the correct voltage and operates efficiently.
3. Vacuum Motor Relay
The vacuum motor relay controls the flow of electricity to the motor. Testing the vacuum relay involves applying 24 volts to the low voltage side of the relay and listening for a click. If there is no spark and no click, it indicates a potential issue with the relay. A malfunctioning relay can disrupt the motor’s operation and should be addressed promptly to prevent further damage.
4. Vacuum Motor Circuit Board
The vacuum motor circuit board plays a vital role in regulating the motor’s performance. To troubleshoot the circuit board, ensure that it is receiving the proper voltage and check for sparks when connecting an electronic device to the output terminals. If there are no sparks or the device does not run, it may be an indication that the circuit board needs to be replaced. A faulty circuit board can lead to motor issues and impact the overall functionality of the vacuum cleaner.
By thoroughly examining and addressing these components, you can diagnose and resolve common problems that may arise with your vacuum cleaner motor. Remember to conduct tests and inspections safely by unplugging the appliance before proceeding.
Conclusion
Testing and troubleshooting a vacuum cleaner motor with a multimeter can significantly contribute to identifying common faults in the appliance. By following the step-by-step guide provided in this article, you can successfully determine whether there are circuit issues, loose connections, worn motor brushes, or problems with other motor components. Prioritizing safety by unplugging the vacuum before conducting any tests or inspections is essential to prevent accidents or damage to the equipment.
If you find yourself unable to identify the cause of the motor malfunction, it is advisable to consult a professional for further assistance or consider replacing the motor entirely. Professional expertise can ensure a thorough diagnosis and resolution of the problem. Remember, a properly functioning motor is crucial for the optimal performance of your vacuum cleaner.
With the proper multimeter troubleshooting tips and techniques, you can efficiently diagnose and fix motor-related issues in your vacuum cleaner. By investing time to understand and troubleshoot these problems, you can save money on repairs and extend the lifespan of your appliance. Keep your vacuum cleaner running smoothly by regularly maintaining and addressing any motor-related issues that may arise.
FAQ
How do I test a vacuum cleaner motor with a multimeter?
To test a vacuum cleaner motor with a multimeter, follow these steps:
– Ensure the appliance is unplugged for safety.
– Set the multimeter to the resistance setting.
– Place the probes on the neutral and live pins on the plug.
– A reading of zero resistance indicates a fault in the circuit.
– Check the fuse within the plug using the multimeter.
– If the fuse has low resistance, it is not the source of the problem.
– Inspect the cable connection to the switch by removing the top of the switch cover.
– If there is a loose connection, it may be the cause of the issue.
– Finally, inspect the motor itself, particularly the carbon brushes. Worn-down carbon brushes may fail to complete the circuit and would need to be replaced.
What should I do if my vacuum cleaner motor is not working after testing it with a multimeter?
If your vacuum cleaner motor is not working after testing it with a multimeter, there may be other issues to troubleshoot, such as:
– Check for any clicking sound when attempting to turn on the vacuum, as this could indicate a dead motor that needs replacement.
– A strong smell coming from the motor could signal a burnt-out motor.
– If the motor is still running but turns on and off on its own, it may be on the verge of failure.
– Inspect the wire connections to ensure they are secure, as loose connections can cause the motor to malfunction.
– If you notice lots of blue sparks while the motor is running, you may need to replace the motor brushes.
– Pay attention to the size and condition of the carbon brushes, as worn-down brushes can lead to motor failure.
What other components can cause issues with a vacuum cleaner?
Apart from the motor, other components that can cause issues with a vacuum cleaner include:
– Motor brushes, which may need replacement if there are large blue sparks wrapping around the commutator.
– Vacuum transformer, which can be tested by applying 110 volts to the appropriate wires and observing for a spark.
– Vacuum relay, which can be tested by applying 24 volts to the low voltage side of the relay and listening for a click.
– Vacuum circuit board, which can be tested by ensuring it is receiving the proper voltage and checking for sparks when connecting an electronic device to the output terminals.
How can I troubleshoot a vacuum cleaner motor with a multimeter?
To troubleshoot a vacuum cleaner motor with a multimeter, you can:
– Test the motor for circuit issues, loose connections, or worn motor brushes using the multimeter.
– Check for any clicking sounds, strong smells, or erratic motor behavior that may indicate motor failure.
– Inspect wire connections for loose connections.
– Replace worn-down carbon brushes.
– Test other components like the vacuum transformer, vacuum relay, and vacuum circuit board using appropriate voltage and observing for sparks or clicks.
Should I consult a professional if I can’t identify the cause of my vacuum cleaner motor issue?
If you are unable to identify the cause of your vacuum cleaner motor issue, it may be necessary to consult a professional for further assistance. They can provide expertise and help in diagnosing and fixing motor-related issues in your vacuum cleaner.


Leave a Reply