To get the most out of your Kirby vacuum cleaner, it’s important to know how to set it up properly. Follow these step-by-step instructions to ensure a quick and easy assembly process.
Assembling your Kirby vacuum cleaner is surprisingly simple. By following the steps outlined in this guide, you will be able to set up your vacuum quickly and start enjoying its powerful cleaning capabilities in no time.
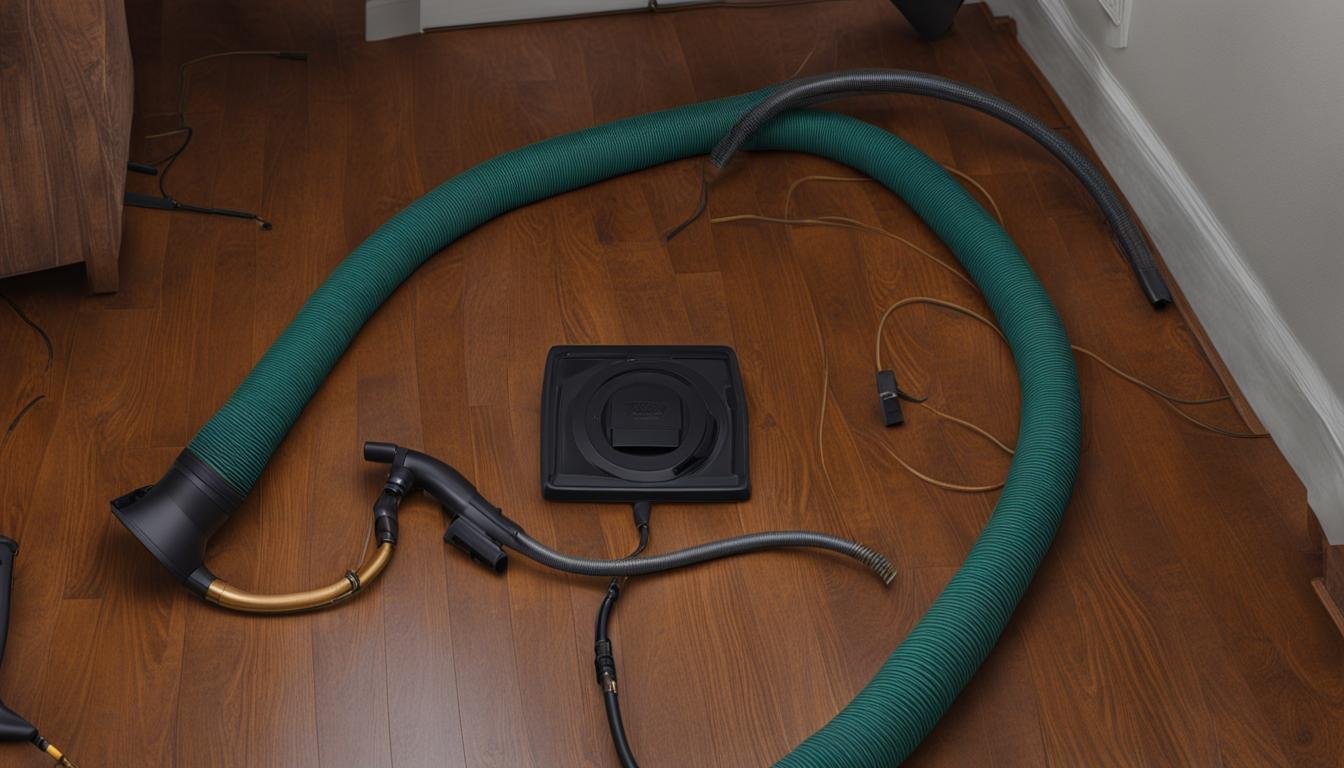
Before beginning the assembly process, make sure you have all the necessary components. These may include the handle, bag, attachments, and power cord. It’s essential to have everything on hand before proceeding.
Start by attaching the handle to the main unit of the vacuum cleaner. This can usually be done by aligning the grooves on the handle with the corresponding slots on the unit. Once aligned, push the handle firmly into place until you hear a click or feel it lock securely.
Next, install the bag by removing the empty bag from its packaging and attaching it to the bag receptacle on the main unit. Make sure the bag is securely attached and properly aligned to ensure optimal performance.
Now it’s time to connect any attachments or accessories that come with your Kirby vacuum cleaner. These may include a hose, brushes, or extension wands. Refer to the user manual to determine the correct attachment points and secure them accordingly.
Finally, plug in the power cord and ensure it is securely connected to both the vacuum cleaner and the power outlet. If your vacuum cleaner has any additional settings or features, consult the user manual for instructions on how to activate them.
With your Kirby vacuum cleaner properly assembled and ready to go, you can now enjoy its powerful cleaning abilities. Ensure that all components are securely connected, and familiarize yourself with the different functions and settings for optimal results.
Key Takeaways:
- Follow the step-by-step instructions to assemble your Kirby vacuum cleaner.
- Make sure you have all the necessary components before starting the assembly process.
- Attach the handle securely by aligning the grooves and pushing it into place.
- Properly install the bag to ensure optimal performance.
- Connect any additional attachments or accessories according to the user manual.
Assembling Your Kirby Vacuum Cleaner
The assembly process for a Kirby vacuum cleaner is surprisingly simple. Here are the steps you need to follow:
- Unpack the Box: Start by opening the box and removing all the components of your Kirby vacuum cleaner. This includes the main unit, handle, hose, attachments, and power cord.
- Attach the Handle: Locate the slot on the main unit where the handle attaches. Align the handle with the slot and push it in until it clicks into place.
- Connect the Hose: Take the hose and insert one end into the designated port on the back of the main unit. Ensure it is firmly attached and secured.
- Attach the Attachments: Depending on your cleaning needs, select the desired attachments such as the crevice tool, upholstery brush, or floor tool. Connect them to the other end of the hose or directly to the main unit, following the instructions provided.
- Plug in the Power Cord: Locate a nearby power outlet and plug in the power cord. Make sure the cord is properly inserted and there are no loose connections.
Once you have completed these steps, your Kirby vacuum cleaner is ready to use. Take a moment to familiarize yourself with the various features and controls before starting your cleaning tasks. For further assistance, refer to the user manual or contact the Kirby customer support team for additional guidance.
With its hassle-free setup and straightforward assembly process, the Kirby vacuum cleaner ensures that you can spend more time cleaning and less time configuring. Enjoy the convenience and power of a well-assembled Kirby vacuum cleaner in maintaining a clean and fresh home environment.
| Benefits of Proper Assembly | Additional Tips for Easy Setup |
|---|---|
|
|
Conclusion
Setting up your Kirby vacuum cleaner is a simple and straightforward process that doesn’t have to be complicated. By following the step-by-step guide provided in this article, you can easily assemble your Kirby vacuum cleaner and ensure all the components are properly connected.
With the right setup, you’ll be able to experience the powerful cleaning abilities of your Kirby vacuum cleaner and keep your home spotless. Whether you’re a first-time user or a long-time owner, these setup tips will help you get the most out of your Kirby vacuum cleaner.
Remember, proper assembly and setup are essential for optimal performance. Take the time to familiarize yourself with the instructions and double-check that all the parts are securely connected. This will ensure that your Kirby vacuum cleaner functions efficiently and effectively.
With the knowledge and confidence gained from this assembly tutorial, you can now enjoy the convenience and cleaning power of your Kirby vacuum cleaner. Say goodbye to dust, dirt, and allergens as you effortlessly tackle your cleaning tasks with ease.
FAQ
How do I set up my Kirby vacuum cleaner?
To set up your Kirby vacuum cleaner, follow these step-by-step instructions:
1. Begin by unpacking all the components from the box.
2. Attach the handle to the main body of the vacuum cleaner by aligning the grooves and pushing them firmly together.
3. Insert the bag assembly into the designated compartment at the back of the vacuum cleaner.
4. Connect the hose to the front of the vacuum cleaner by twisting and pushing it securely into place.
5. Attach the desired cleaning tool to the end of the hose, such as the brush or the extension wand.
6. Plug in the vacuum cleaner to a power outlet.
7. Your Kirby vacuum cleaner is now set up and ready to use.
Is setting up a Kirby vacuum cleaner difficult?
Not at all! The assembly process for a Kirby vacuum cleaner is surprisingly simple. Just follow the step-by-step instructions provided above, and you’ll have your vacuum cleaner ready to go in no time.
Are there any tips for a hassle-free Kirby vacuum cleaner setup?
Absolutely! Here are a few tips to make the setup process even easier:
– Familiarize yourself with the included instruction manual before starting the setup process.
– Lay out all the components in a clear and organized manner before beginning assembly.
– Ensure all connections are securely fastened to avoid any loose parts during operation.
– Take your time during the setup process to ensure everything is assembled correctly.
– If you have any questions or concerns, don’t hesitate to contact the Kirby customer support team for assistance.
Can I use my Kirby vacuum cleaner right after setting it up?
Yes, once you have completed the setup process and plugged in your Kirby vacuum cleaner, it is ready to be used. You can start cleaning your home immediately and enjoy the powerful cleaning capabilities of your Kirby vacuum cleaner.


Leave a Reply